It’s a daunting task for developers to build a war file whenever changes has been made to the repository as it burns more of their time which can be utilized efficiently. How about automating this time consuming process thereby improving the productivity of the developers and preventing human errors?
War file Generation
Thanks to open source and a continuous integration tool like Jenkins. With plugins such as Grails and Subversion, we are now able to build a war file in a server within seconds. Java is required (of course!) for Jenkins to run. You may use plugins such as Slack notification plugin, if you need to notify channels regarding the status of this build.
Securely transferring the war file to the server
Now, coming to save some time for the Infra team, why not transfer the file to the corresponding server via Jenkins and deploy the application! The war file generated in the above step is then securely copied to the server using scp. You would need to preconfigure your Jenkins server to access the application server without password using ssh keys. Never setup ssh keys for the root user in case if your Jenkins server gets compromised, the hacker will gain root access to all your application servers.
Backup
The war file is now at the destination, it is time to take a backup. A backup script written by one of our Server admins is already in place. This script takes a backup of this file and moves it to a directory with time stamp so that we can restore the application to a specific date. Additionally, this also removes the existing war file and the server’s cache of the existing application before placing the new file under the pre-configured ‘webapps’ directory of Tomcat.
This backup script is specified in Jenkins so that it executes after the war file is successfully transferred.
War deployment Success after seconds!
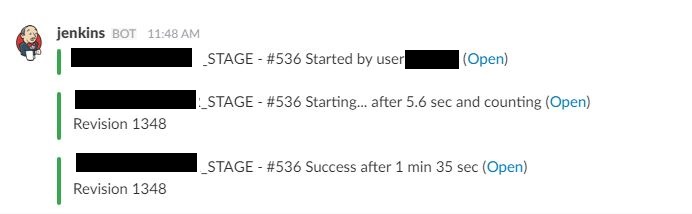
If you have already configured a notification plugin in Jenkins for this build, you will receive the status at this step. We use Slack and we receive notifications containing details such as the developer’s name who initiated the build, name of the build (application), revision number, etc.,. as shown in the screen-shot below:
All the steps mentioned above is done under the click of a button. This can also be automated so that whenever Jenkins detects a change in the repository it initiates a build. Be more careful on this as this may cause more downtime for the app if there are more changes on the repository done by developers for a specified period of time.
Security
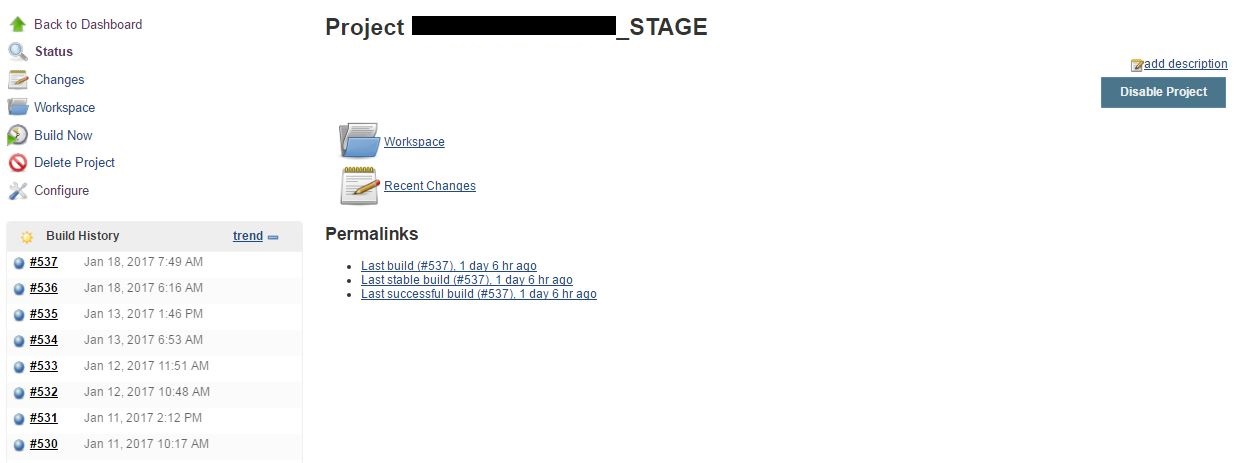
As this deployment model has access to the repository and the app instance. It is absolutely important to have this environment secured. We are able to provide access level security via Jenkins’ Project-based Matrix Authorization Strategy. Adding to the security, you can have IP restrictions on the port number of Jenkins so that only developers or leads can initiate a deployment. The below is a screen shot of the available options for a Jenkins build. You can revoke permissions such as the Delete Project and Configure button for your developers when configuring the project based security.
Voila! you are now equipped to automate this routine task that has been eating all your developer’s time and resources.